A retail bid and an insurance estimate answer two different questions. A bid says here's my price to do this job. An insurance estimate says here is every operation this roof requires, priced at the carrier's own rates, and here's why each one belongs. Confuse the two and you'll lose money on every claim you touch — not because you priced too low, but because you never made the argument.
The estimate is the argument. Everything downstream — the supplement, the appraisal, the escalation — is just you defending a number you should have documented in the first place.
Here's how one is actually built.

What makes an insurance estimate different
Three things, and they're the reason a retail bid can't just be relabeled.
You're pricing in someone else's price list. Carriers settle against a published, regional price list — for most of the industry, Xactimate. Your cost structure is irrelevant to the conversation; what matters is what that price list says the operation is worth in your ZIP code this quarter. Your job isn't to name a price, it's to make sure every operation the job requires appears in the estimate at the correct line item.
Omission is the default failure, not underpricing. Adjusters work fast, often from the ground or from photos, across every trade. The line items that vanish are the ones that aren't visible from a driveway: valley metal, drip edge, ice barrier, ridge ventilation, the second layer nobody knew about. A missing item is worth exactly zero, and no amount of good pricing on the remaining items recovers it.
It has to survive a stranger's review. The person approving your estimate has never seen the roof. Every line has to be legible to someone reading a PDF in an office three states away — which means measurements, photos, and code citations aren't decoration, they're the load-bearing part.
The anatomy of a roofing estimate
Whatever software produced it, an insurance estimate has the same skeleton. Knowing the parts tells you where to look when a number seems wrong.
Anatomy of a Roofing Insurance Estimate
Claim header
Claim and policy number, date of loss, carrier, adjuster, insured, property address, price list version and region.
Watch for: The price list version — an outdated list underprices the whole estimate.
Scope / line items
Every operation, grouped by elevation or area. Quantity, unit, unit price, and the trade category each item draws its labor rate from.
Watch for: Removal items priced under demolition labor instead of roofing.
Modifiers
Steep-slope and high-roof charges, waste factor, and any access or staging allowances.
Watch for: Missing entirely on steep or two-story roofs.
Recap
Line-item subtotal, overhead and profit, sales tax, then replacement cost value (RCV).
Watch for: O&P absent, or applied to only part of the estimate.
Settlement summary
RCV minus depreciation equals actual cash value, minus the deductible equals the first check. Recoverable depreciation listed separately.
Watch for: Labor depreciated where state law doesn't allow it.
Section names vary by software and carrier, but the sequence is consistent: what the job is, what it costs, then what actually gets paid now versus later.
The part contractors skip past is the recap. That's where replacement cost becomes actual cash value, where depreciation comes out, and where the deductible lands. Two estimates with identical line items can pay very differently depending on what happened in the recap — so read it before you argue about anything above it. If RCV, ACV, and recoverable depreciation aren't second nature yet, start here; the recap is where all of that shows up in real dollars.
Step 1: Measure the roof properly
Everything multiplies off the measurement, which means a measurement error isn't one error — it's an error on every line item priced per square.
Roofing is priced in squares: one square is 100 square feet of roof surface. Not footprint. The measurement you need accounts for pitch, because a 7/12 roof has meaningfully more surface than the rectangle it sits on.
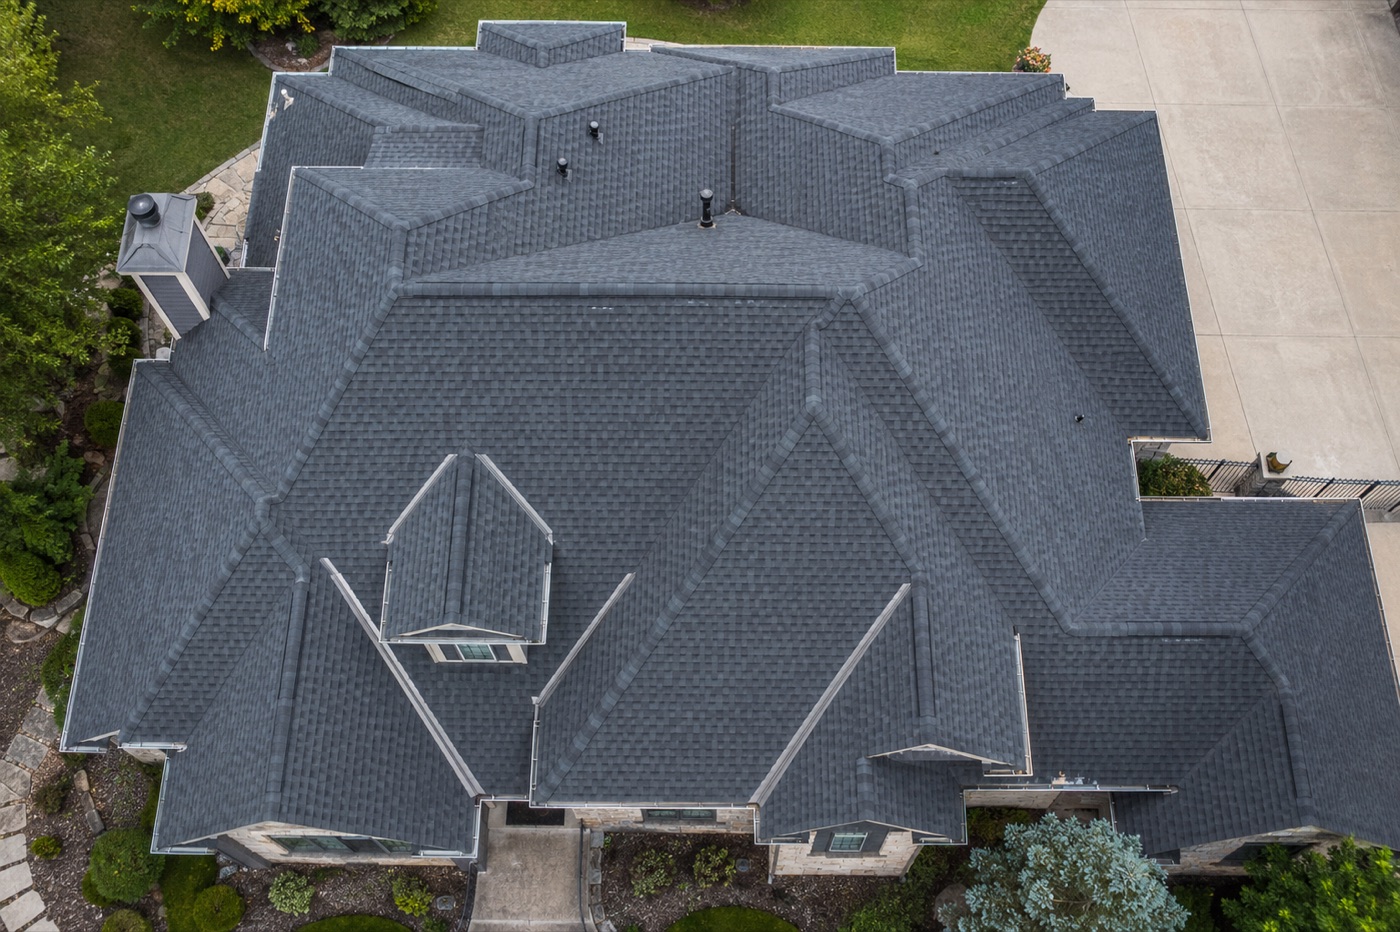
You have three practical options: a report from an aerial measurement service, a measurement pulled from imagery, or a hand measurement. Whichever you use, the estimate should carry the measurement report as an attachment, not just the resulting number. A diagram showing facets, ridges, hips, valleys, and pitch is what makes a scope defensible — and when the carrier's number is 15% under yours, the diagram is the conversation.
Count and record separately: total squares, ridge and hip linear footage, valley linear footage, rake and eave linear footage, number of penetrations, and the pitch of each facet. Every one of those drives its own line item.
Step 2: Write the scope before you write the price
The scope is the sentence version of the job: tear off two layers to the deck, replace 8 sheets of decking, install ice barrier at all eaves, new synthetic underlayment, architectural shingles, new ridge vent, replace all step and counter flashing, new drip edge at eaves and rakes.
Write that first, in plain language, before you touch a line item. The scope is what you're actually arguing for; the line items are just its translation into the carrier's vocabulary. Contractors who start in the software end up estimating whatever the software makes easy, which is how the same six line items show up on every job regardless of what the roof needed.
Step 3: Translate the scope into line items
In Xactimate, every line item lives in a trade category, and the prefix tells you which trade's pricing it draws on — RFG for roofing, DMO for demolition, SFG for soffit/fascia/gutter, PNT for paint. The category isn't cosmetic: each trade carries its own fully-burdened labor rate, built from the worker's wage plus labor burden (comp, liability, unemployment, FICA) plus labor overhead, per Verisk's published pricing methodology.
That's why the single most common pricing error on a roof estimate is a category error, not a quantity error. Removal items have long defaulted to demolition labor — as though a crew of day laborers strips the roof and leaves before the insured roofing crew shows up. They don't; one crew does both. That default alone can cut your tear-off labor roughly in half, and it's worth understanding the RFG/DMO split before you write another estimate.
Work the roof systematically so nothing drops: removal, deck repair, underlayment, starter, field shingles, ridge and hip, valley metal, drip edge, flashings, ventilation, penetrations, detach-and-reset items, then cleanup and haul-off. The line items adjusters miss are almost always in the back half of that list.
Step 4: The modifiers nobody adds
A correct line item at the correct quantity can still be underpriced if the conditions of the job aren't reflected. Three modifiers get left off constantly.
Steep charges. Xactimate handles pitch through discrete line items rather than an automatic uplift, and the surcharges begin at 7/12. Price lists carry three tiers, worded in the software as "Additional charge for steep roof - 7/12 to 9/12 slope," "- 10/12 - 12/12 slope," and "greater than 12/12 slope." Each has a matching Remove counterpart for the tear-off side, and all are priced by the square — which means they apply to the portion of roof in each band, not to the whole roof. One published Xactimate estimate carried a 51.93-square roof as 46.25 squares at the 7/12–9/12 rate plus 5.68 squares at the 10/12–12/12 rate.
While we're here: you'll see it claimed that the steep threshold is 4/12. It isn't. 4:12 is a real roofing threshold — it turns up in underlayment requirements and the low-slope/steep-slope distinction — but Xactimate's surcharges start at 7/12, and conflating the two is how that claim spread. The full breakdown of the tiers and how they're allocated is worth a read before your next steep job.
High charges. Height is a separate item reading "Additional charge for high roof (2 stories or greater)," and there's just the one threshold — no separate three-story item, whatever you may have read. Because it's independent of pitch, the steep and high quantities on the same estimate are often different numbers.
Waste. Here's the part most contractors don't know, and it's the reason waste is an argument at all: Xactware's own documentation states that Xactimate includes waste in item pricing for most items, but RFG (shingle) items do not include waste in their pricing. Roofing is one of only three categories where it isn't baked into the unit price. If nobody adds it, it isn't there.
There's also no published default. Waste is a figure the estimator enters — by hand, or through an optional auto-calculate preference — and Verisk publishes no recommended percentage. The one body that does publish a number is the Asphalt Roofing Manufacturers Association, whose Residential Asphalt Roofing Manual puts trim waste at 2% to 10% depending on valleys, dormers, hips, and penetrations. Read that before quoting it, because 10% is ARMA's ceiling, not its floor. The familiar "10% simple, 15% cut-up" rule is field convention — worth knowing because it's probably what the other side is using, but neither party can cite it.
One thing ARMA is explicit about that's worth money: starter strip, drip edge, hip and ridge, valley flashing, and ventilation accessories are quantified from the linear footage of the eaves, rakes, hips, ridges, and valleys where they're installed. They're linear-measure items, not something to bury inside a percentage of your field shingle count.
The pattern with all three: they're conditions of this roof, so they need evidence from this roof. A pitch reading in a photo, a two-story elevation shot, a facet diagram showing the valleys that drive the waste. That's also why the argument is won upstream — a measurement report documenting the geometry settles it faster than any percentage you can assert.
(Wording and rates vary by Xactimate version and by the monthly, market-specific price list, so confirm against your own list before leaning on it in a supplement.)
Step 5: Include what the code requires
This is the category with the highest dollar value and the highest denial rate, and it's where most estimates are thinnest.
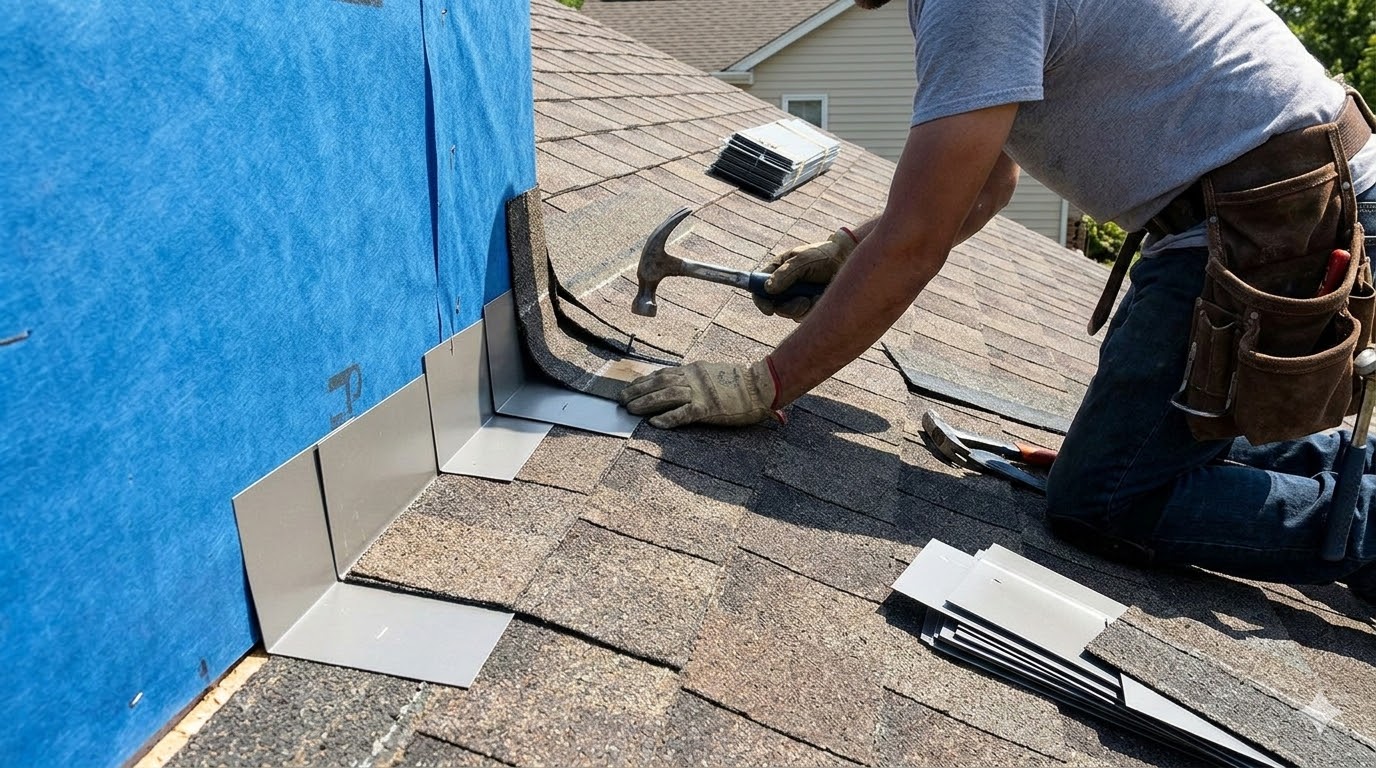
Current code frequently requires things the original roof never had, and a roof going back on today has to meet today's code — not the code from whenever the house was built. Code-required work isn't an upgrade you're asking for; it's the legal minimum for reinstalling the roof at all. Ice barrier (IRC R905.1.2), drip edge at eaves and rakes (IRC R905.2.8.5), attic ventilation (IRC R806), and full tear-off in situations where a recover isn't permitted (IRC R908) are the usual ones.
Two rules make these stick. Cite the specific section and the code edition your jurisdiction actually enforces — codes are adopted locally, so "code requires it" moves nobody while "IRC R905.1.2, as adopted by [county]" moves the file. And claim them under the policy's Ordinance or Law provision where one applies, because that's the bucket the money comes from.
Step 6: Overhead and profit
If the job requires coordinating multiple trades and enough complexity that a general contractor would reasonably be involved, overhead and profit belongs in the estimate. The convention is a 10% and 10% markup, though markups vary and the convention isn't a fixed rule — and notably, Verisk's own guidance leaves O&P to the estimator's judgment based on the conditions of the job rather than imposing the "three trade rule" adjusters often cite.
It's the single most disputed line on a roof claim, and it's worth knowing exactly when it's owed and how to prove it rather than treating it as automatic or conceding it when challenged.
Step 7: Build the documentation around it
The estimate is the argument; the documentation is the evidence. A number without evidence is a negotiating position. A number with evidence is a correction.
At minimum, attach: the measurement report with its diagram, overview photos of each elevation, close-ups of the damage with a scale reference, photos of every condition driving a modifier (pitch, height, layers, deck condition), and the code sections you're citing. The photo documentation checklist covers what to shoot and how.

Where estimates go wrong
The failures repeat, and they're all cheap to avoid:
- Estimating from the software instead of the roof. You end up with the line items that are easy to add rather than the ones the job requires.
- Skipping the recap. Arguing about a line item when the real problem is how depreciation was applied.
- Round numbers. "10 squares" and "100 feet of ridge" read as estimates in the pejorative sense. Real measurements have odd numbers in them.
- No pitch or height documentation, then trying to add steep and high charges by supplement later.
- Treating code items as optional. They're the highest-value items in the estimate and the first ones cut.
- Writing the supplement as the plan. The supplement should catch what genuinely emerged after tear-off, not what you didn't bother to document up front.
Key takeaways
- An insurance estimate is a documented argument, not a bid — priced in the carrier's price list, defended with evidence.
- Omission, not underpricing, is the default failure. A missing line item is worth zero regardless of how well everything else is priced.
- Measure in squares off a real diagram, and attach the measurement report, not just the total.
- Write the scope in plain language first; line items are its translation.
- Category errors cost more than quantity errors — removal defaulting to demolition labor prices skilled roofing work at roughly half rate.
- Steep charges start at 7/12 (not 4/12) across three tiers, and high roof is a single "2 stories or greater" item — both priced by the square.
- Shingle line items don't include waste in their pricing. If nobody adds it, it isn't there — and ARMA's published trim-waste range is 2–10%, not the 15% you'll hear quoted.
- Code-required work is the legal minimum, not an upgrade — cite the section and the locally adopted edition.
Write the estimate once, correctly
Most of what's above is discipline rather than difficulty — but doing it on every job, at volume, in the middle of storm season, is where it breaks down. ClaimSpark builds insurance-ready estimates and supplements from your claim documents: correct line items and labor categories, code-required work cited to the section, and O&P justified where it's owed — for a flat fee per estimate, not a percentage of your claim.
ClaimSpark helps roofing contractors generate professional estimates, build supplement packages, and maximize claim value. Try free — 1 estimate and 1 supplement included.